Pages

Wednesday, December 15, 2010

Tin Can Luminaries


Are you looking for a fun project to do with your kids over Christmas break? I might have something for you. My kids are addicted to these luminaries. They gather up the tin cans while I am cooking, wash them out and haul them down to the dark, scary basement for safe keeping until I am ready to have a tin can luminary marathon with them. They are really quite cute and it is recycling at it's best.


You need a few things for this project. An assortment of empty tin cans, acrylic paint, hammer, nails of various sizes, a towel, a pencil, a small paint brush, and some sort of votive candle or tea lights.


I am going to use these battery operated tea lights since I am allergic to some candle scents.


I am going to make a whole bunch of snowflake luminaries for our bookcase. The bookcase holds a lot of family photos from a photo session when we all wore light blue. So I am going to match my luminaries to the photos. I choose a new Extreme Glitter paint in turquoise. The other paints have a metallic finish. I choose silver, pearl and periwinkle to coordinate with the bookcase. There is a whole rainbow of acrylic paint colors in metallic finishes that you can choose from.


Now to get started, remove the label from your tin can. Fill the can with water and freeze it overnight until the ice is rock hard. Where we live it is freezing cold so we just put the cans outside.


Then put your frozen can on a towel to keep it from rolling all over while you are working on it. I draw a pattern in the frost so I have a guide to follow.


Punching the holes in your cans is not hard, but it takes time. Start at the top of the can. Put your nail in the spot you want a hole and then pound the nail through the can with the hammer. Punching the holes is easy, but I would recommend that you use a lighter hammer. My arm got tired after the third or forth can when I used my husbands hammer. Just take your time and be careful with your little fingers.


When you have your design punched out you can smile like crazy. I do. :-) The the next step is very important. Take you can to the sink to let the ice melt out of it. Speaking from experience, those cans hold more ice than you want melting all over your table!


Most of the time, the bottom of the can will warp in the freezing process. When the ice has melted away, just flip you can upside down and use your hammer to pound it back into shape. It does not have to be perfect.


My favorite part is painting the little cans. Start with a dry tin can. I usually plan on giving each can about three coats of paint. The extreme glitter paint might need even a few more coats than that depending on what you like.

An important step is using a toothpick, or a piece of wire to poke the holes open when they get filled with paint. You need to get those holes open immediately after painting. Do not wait to open them after the the paint has already dried.


Finally, display your mini works of art. I could fill my house with these little things if I had an unlimited supply time and paint.


We started making these for the Halloween party that we had this fall. We made a sea of pumpkin faces in fall colors.


I used metallic black paint to fill in the shapes of their little faces. I loved the way these guys turned out.


We made a bunch of them for Christmas as well. This project is only limited by your imagination.

Sunday, December 12, 2010

I'll Be Home For Christmas


We have been working on decking our halls.


This weekend we had a snow storm. A blizzard actually and I loved every minute of it. We made cookies and sat in front of the fire. We listened to music and even sang along to a few of our favorite Christmas carols. And best of all, we made a huge mess in the kitchen to help deck the halls.


We measured.


We cut.


We frosted.


We sprinkled.


We let them dry.


And we hung them on the tree.


Our green, white and silver Christmas tree is one of my favorite trees ever. I love how good the gingerbread smells and I love the kids' stamp of creativity on each little ornament we made.


Saturday, December 11, 2010

The Center of Attention


Fact: The holidays are a busy time of the year. It is one of my favorite times of the year and I want to squeeze every bit of festive fun out of the season that I possible can. So I really try to come up with quick, cheap short cuts that make a big impact. I get lots of compliments on this centerpiece whenever I put it out and very few people even believe the fruit is real. But the best part of all, is that the next day when you are finished with your centerpiece you can wash off the fruit and eat it. All you have wasted is an egg white and some sugar. I love that. :-)

To start, I gather up my supplies. You will need a variety of fruit colors. I am using a Red Delicious apple, lemons, Granny Smith apple, navel orange, and limes. You also need an egg, a few bowls, sugar, a spoon, a fork, a brush of some sort and wax paper.


Separate the egg. We only need the egg white.


Use a fork to whip up the egg white a bit. You want to break down the membrane in the egg white and make the white a bit frothy.


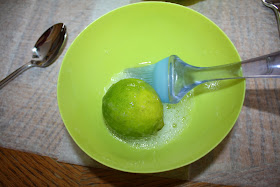
Put a piece of fruit in the bowl and use the brush to make sure the fruit is coated with the egg white. If you miss a spot, the sugar will not stick, so this is an important step. Pick up the fruit and let the extra egg white drip off.


Put the fruit into the bowl of sugar. Use the spoon to coat the fruit with sugar.


Then put the fruit on the wax paper to dry. I usually give my fruit about fifteen minutes to dry.


When all your fruit is sugar coated and dry, you can begin to put your centerpiece together. I am using my favorite cake pedestal, ribbon, cedar branches, and a few colored balls for a little extra sparkle on the table.


Start with a layer of cedar leaves or any evergreen you have in your yard to give it a bit of festive color.


Add your fruit to the plate. I was super impatient to put this together so I was using the fruit before it was completely dry. That is why this shot looks so blotchy. After the fruit dries, it will look evenly frosted.


Then make a pretty bow for your arrangement.


I am attaching the bow with my favorite glue dots.


Voila! In the top picture I sprinkled pomegranate seeds around the edges to give it a pop of red color. A pretty ribbon winding through the fruit would be a nice touch as well as candle light. You can get as creative as you want with this idea. The fruit will last for about one week. After a week, the sugar coating begins to crack and fall off the fruit. Enjoy!

Tuesday, November 30, 2010

Deck the Halls

I love decorating for Christmas. Every year I try to add something new to our Christmas decoration collection. This year I found an awesome garland for the living room which I usually try to decorate with a whimsical theme for the kids. This is a do it yourself type of project and I am really digging it. I found these things at one of my favorite craft and home decor stores in my area.


I am not exactly sure what these things are called, but it is a nine foot wire that has two little wired sprigs of evergreen every six inches. Open the wired evergreen so that it forms a V.


Pinch and gather the mesh about one foot from the edge. Put the gathered mesh in between the two evergreen sprigs and twist them together to secure the gathered mesh.


Then repeat the same process over and over again. Gather the mesh about one foot from the gather and secure it between the two wired sprigs. Without any effort on my part, it is naturally loopy and beautiful. This mesh is idiot proof which is why I love it so much. I feel like a genius for putting this together!


After the mesh is on the frame, I started adding a few embellishments. I think it is beautiful as is, but I wanted to play around and see what else I could do with it. So I wired a few plastic ornaments to add onto my...garland? ...mesh sculpture? ...thing-a-ma-bob? I think this thing needs a name. Anyway, I took a twelve inch piece of floral wire (Found in any craft store that also sells silk flowers or floral supplies.) and threaded it through the hook of a PLASTIC silver ball. I would recommend plastic if this is going to be hung over head. That way if one falls off the garland, you will be safe.


Pinch the wire at the joint to bring the wires closer together.


Hold the wire as close to the ornament loop as possible and twist the ornament with the other hand. This will create a twist in the wire as close to the ornament as possible.


Then find the perfect spot for a little splash of sparkling silver and wire the ornament to the garland. You can use several balls together or use them all by themselves.