Showing posts with label Snack. Show all posts

Thursday, July 14, 2011

Sandra Lee's Snack Mix...Fun Treats

During the summer snacks are very much in demand, however we try not to use the oven on hot days.  (We do not have central air conditioning.)  So over the years, I have had to come up with a few special treats that do not involve baking of any kind.  This snack has quickly become one of our favorites.  It is a snack mix recipe that I found in one of my favorite magazines, Sandra Lee Semi-Homemade.   

The recipe calls for a huge bowl of crunchy snack items like Crispix cereal, Cheerios, pretzels, peanuts and golden raisins are a nice surprise in this recipe.   My board of ingredients is lost...so I will be forced to make it again and take a new picture of all the ingredients.  The kids are pretty happy about that.

Step one, put everything in a big bowl.   You might want to half the recipe or put the ingredients in two bowls so there is enough room in the bowl for mixing.


Next in is the melted vanilla flavored candy coating.  A whole recipe calls for two pounds of candy coating.  I melted the first package in the microwave poured it over the snack mix and mix it in right away.   


This is what it looked like after the first pound of candy coating.


The second pound of candy coating looks much better.  If you waited to mix both packages of candy coating into the snack mix together, then the first pound of coating would start to harden and you would not get a nice even layer like you have here. 


Now for the fun part.  Adding a little personality to the treat is a really great way to make this treat perfect for so many occasions.  I made this batch for the 4th of July.  I have used orange and black sugar for Halloween, pink and red for Valentine's Day, red and green for Christmas, orange and yellow for Thanksgiving and all sorts of colors for various parties throughout the year.  This snack is not just for the kids either.  I brought this along to a 4th of July party and the adults were as happy with it as the kids.  The sweet/salty combination along with the crunch is just fantastic.  I love this recipe. 


First add one color of sugar and mix it into the snack mix. 


Then add the second color of sugar and give it all a good mix.


The color is not super bright, but it just adds a fun touch to the snack.  I love fun food.


Then you need to let the candy coating dry.  Divide the snack mix up and spread it out.  You will need to break it apart after it dries so spread it as thinly as you can.  I divided a whole batch up into two jelly roll pans as well as leaving some spread out in the bottom of the mixing bowl.  


When the coating had dried and we had broken up the large chucks, we measured out one cup servings and put them in folding sandwich bags.  Zip lock bags would have worked, but they are more expensive. 


I tied the bags shut with red, white and blue ribbons and piled it all up in this awesome bowl.  I think it was the perfect {easy} treat for the weekend. 


Last year I had a more Americana theme for the 4th of July and I tied the treat bags with twine and red and blue ribbon.  I loved the way it looked.  I took an old cookie tin from Christmas and used a little scrap book paper and some stamps to make a cute little container to hold all the treat bags. This snack mix is so versatile.  It is only limited by your imagination.  Happy snacking!


For the original recipe from Sandra Lee click here.

Thursday, April 28, 2011

Snack Time Budget Busters

My kids are always hungry.  They wake up starving.  They inhale their lunches.  They need fuel and energy after school before track practice, and they come home ready to eat their own weight in food.

 I buy a lot of ingredients versus pre-made foods.  If we have pizza, I get the flour and yeast out and make a crust.  I grate the cheese and pull out some pepperoni.  I could not afford to fill the kids up with frozen pizzas. Frozen pizzas are a great convenience, but we simply cannot afford them for the eating crew that shows up at our dinner table every night.

With that said, prepackaged snacks are a necessity for us.  We all have busy schedules and I have a hard enough time keeping up with three meals a day.  Prepackaged snacks are expensive and I hand out about two snacks per person a day!  That means we go through about 10 snacks every day!

I came up with a little trick to help control the costs of our prepackaged snacks.  I rarely ever pay more than $0.25 per snack.  I am a warehouse club member which helps, but I also watch the local grocery store sale ads.  Below are some of the snacks that fall into the $0.25 rule. These are not the healthiest snacks on the market and I am not trying to advertise these products in any way.  I'm just sharing my thought process with you.


These things are great tasting and it only takes one for the kids to feel like they have eaten a snack.  I paid $8.28 for this box.  That is a cost of $0.276 per bar.  It's a touch over the cost, but real almonds and great taste make this worth the extra two and a half cents per bar.


These bars have dried fruit, oatmeal, and nuts in them.  They cost $0.229 cents a bar.   


Nutri-Grain bars are great to have on hand because they can also work as a quick breakfast with a banana and a glass of milk.  They are also make with whole grains.  This box cost $12.47.  The cost of each bar is $0.259.


Go Gurts cost $0.233 per pouch of yogurt.  Go Gurts are full of artificial coloring, artificial flavor and have more than enough sugar to make the kids happy.  If yogurt is their idea of junk food, I am okay with that.  


I hope this helps a bit the next time you got the grocery store.

Saturday, January 8, 2011

Birthday Party Campout and Caramel Corn


My youngest son, Isaac, just turned 13. Isaac is an amazing young man. He is so creative and curious about the world around him. As often as possible I try to let the kids decide how they would like to celebrate their birthday. When I asked Isaac I knew he was going to have something fun up his sleeve. He did. Isaac chose to have a fall themed party with his very best friends. He wanted red, orange and yellow leaves to be the theme. I added camping to the overall idea of the party which he loved. Together we came up with some pretty cool ideas for the important occasion of becoming a teenager. :-)

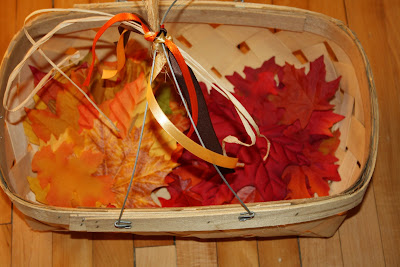
We planned some games for the kids after everyone had arrived. We divided all the kids up into two teams and then we sent them on a scavenger hunt for colored leaves that my husband, Joel, had carefully hidden. We had a red team and a yellow team. The kids had so much fun hunting for their team's leaves. There were some easy to find leaves and then there were some leaves that were super hard to find. The kids love scavenger hunts and this one produced lots of laughs and a spirit of fun competition. Joel and I had just as much fun watching the kids as the kids had searching for the leaves.


After a few of Isaac's favorite games came a few of Isaac's favorite foods. The menu was tomato soup, grilled cheese and Caesar Salad. I cut leaf shapes out of the bread before I made the grilled cheese sandwiches to give it a little extra special touch. I will have a tutorial about this technique here.


After dinner and presents were out of the way, the kids settled down with a movie and a few of the snacks that Isaac had requested. I made caramel apples, hot cider and the amazing caramel corn.


After the movie, snacks and goofing around the kids were finally ready for bed. We tried to create a super cool place for the boys to rest their heads. We used all the Christmas trees that we had to make a forest wall in the living room. We draped orange, yellow and red lights on the trees for an autumnal touch. We used all the extra leaves and leaf garlands that we could find to decorate the fireplace...I mean campfire.


We sent each of the kids home with a little thank you for coming gift bag that was filled with a baggie of trail mix, a flashlight, and a compass.


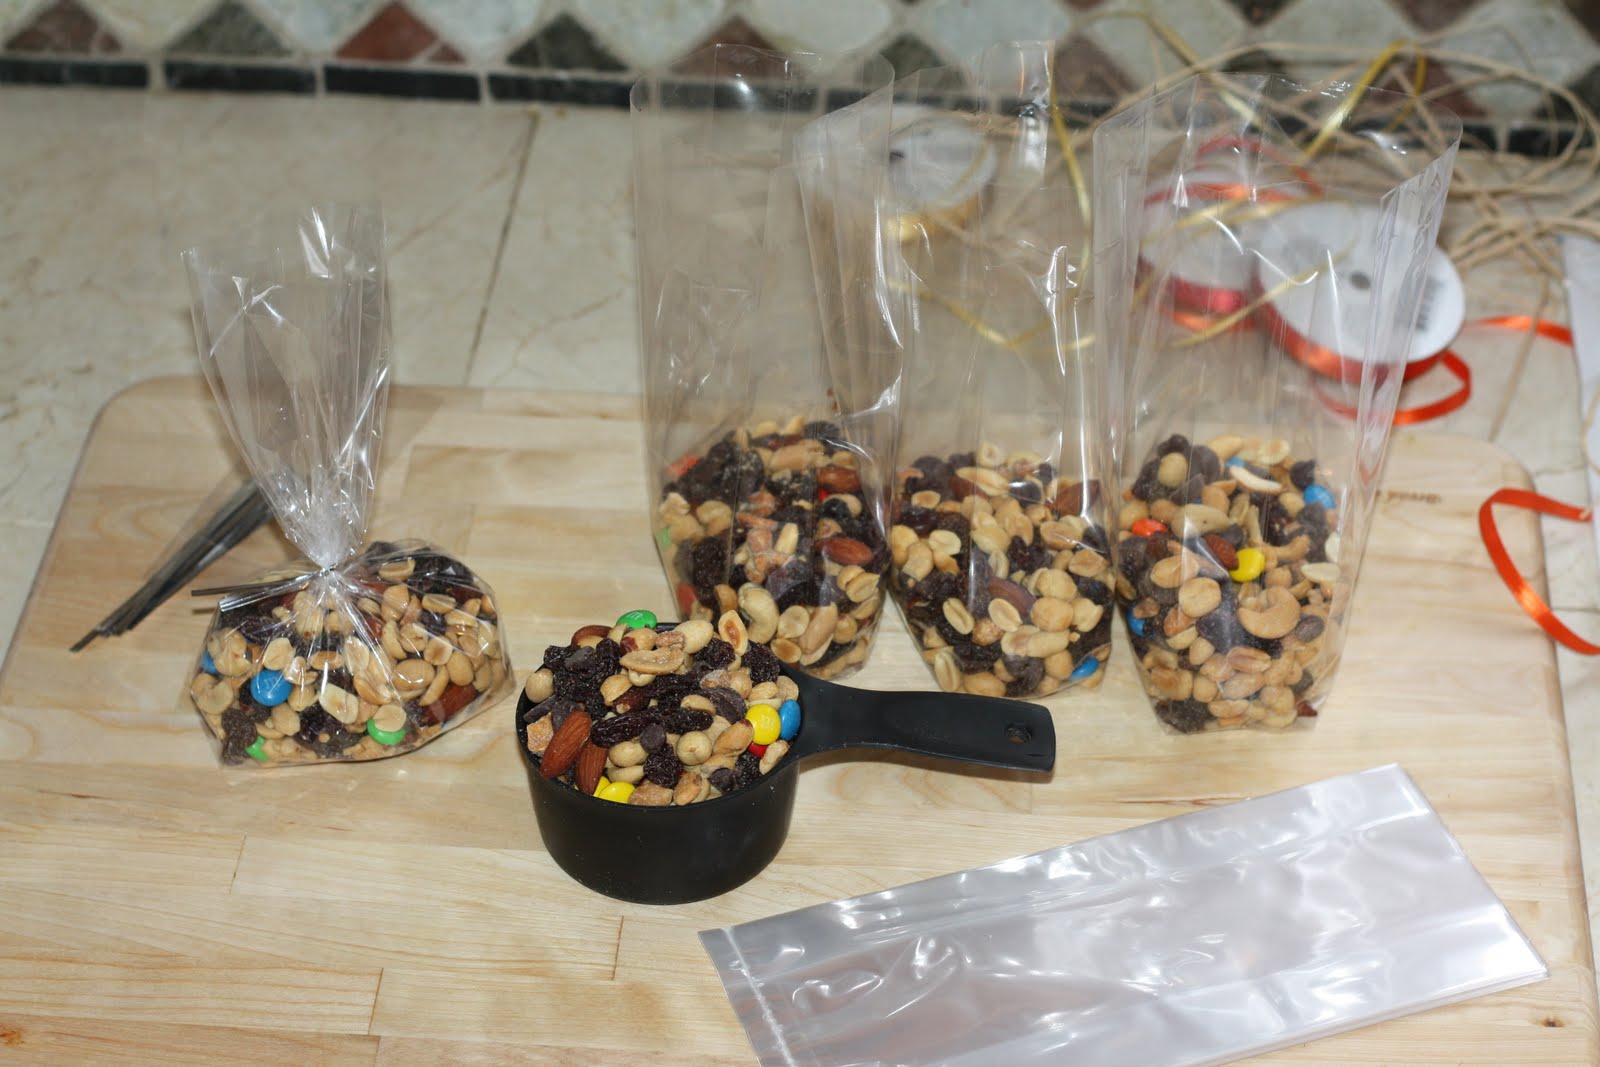
For our trail mix, we customized a bag of WalMart trail mix to make the birthday boy as happy as can be.


I put the store brand trail mix in a big bowl.


Then I added some bittersweet chocolate chips, semisweet chocolate chips, roasted and salted cashews, and some honey roasted cashews to the mix. I gently mixed everything together.


I bagged the trail mix in clear treat bags and tied them shut with colored ribbon and a bit of raffia to add a bit of a rustic look.


And finally, I made little invitations and thank you cards for Isaac to give to his friends. I never got a picture of the invitations. :-( But here is a thank you note. I used the same paper on the gift bags up above. A friend found some really cool clearance scrap book paper that was actually a thin piece of wood. Isaac loved the stationary and he was very happy to hand them out to his friends.


I was really happy with the way everything came together, but most importantly, my son was so happy with his party. Mission accomplished. All the planning and work had been so worth his happiness. :-)

Now for the caramel corn recipe. The board of ingredients are amazingly simple for something so yummy.


To begin, set yourself up. Pour your popcorn and peanuts into your largest roasting pan. You will be stirring this a few times while it bakes, so something with a bit of a side is nice. If you don't have something large enough to hold all the popcorn and peanuts, divide the popcorn and peanuts into two smaller pans.


Measure out your baking soda so you are ready to go.


Add your corn syrup, butter, salt and brown sugar to a large saucepan and cook over medium high heat. Your caramel is going to bubble up as it cooks so you want plenty of room in your pan.


You want to stir the caramel as it cooks. When tiny bubble begin forming at the edges of the caramel, set your timer for five minutes.


As your caramel boils, it is going to bubble up. Don't worry, but be very careful. One things that is very important is to time your boiling caramel. Boil the caramel for exactly five minutes.


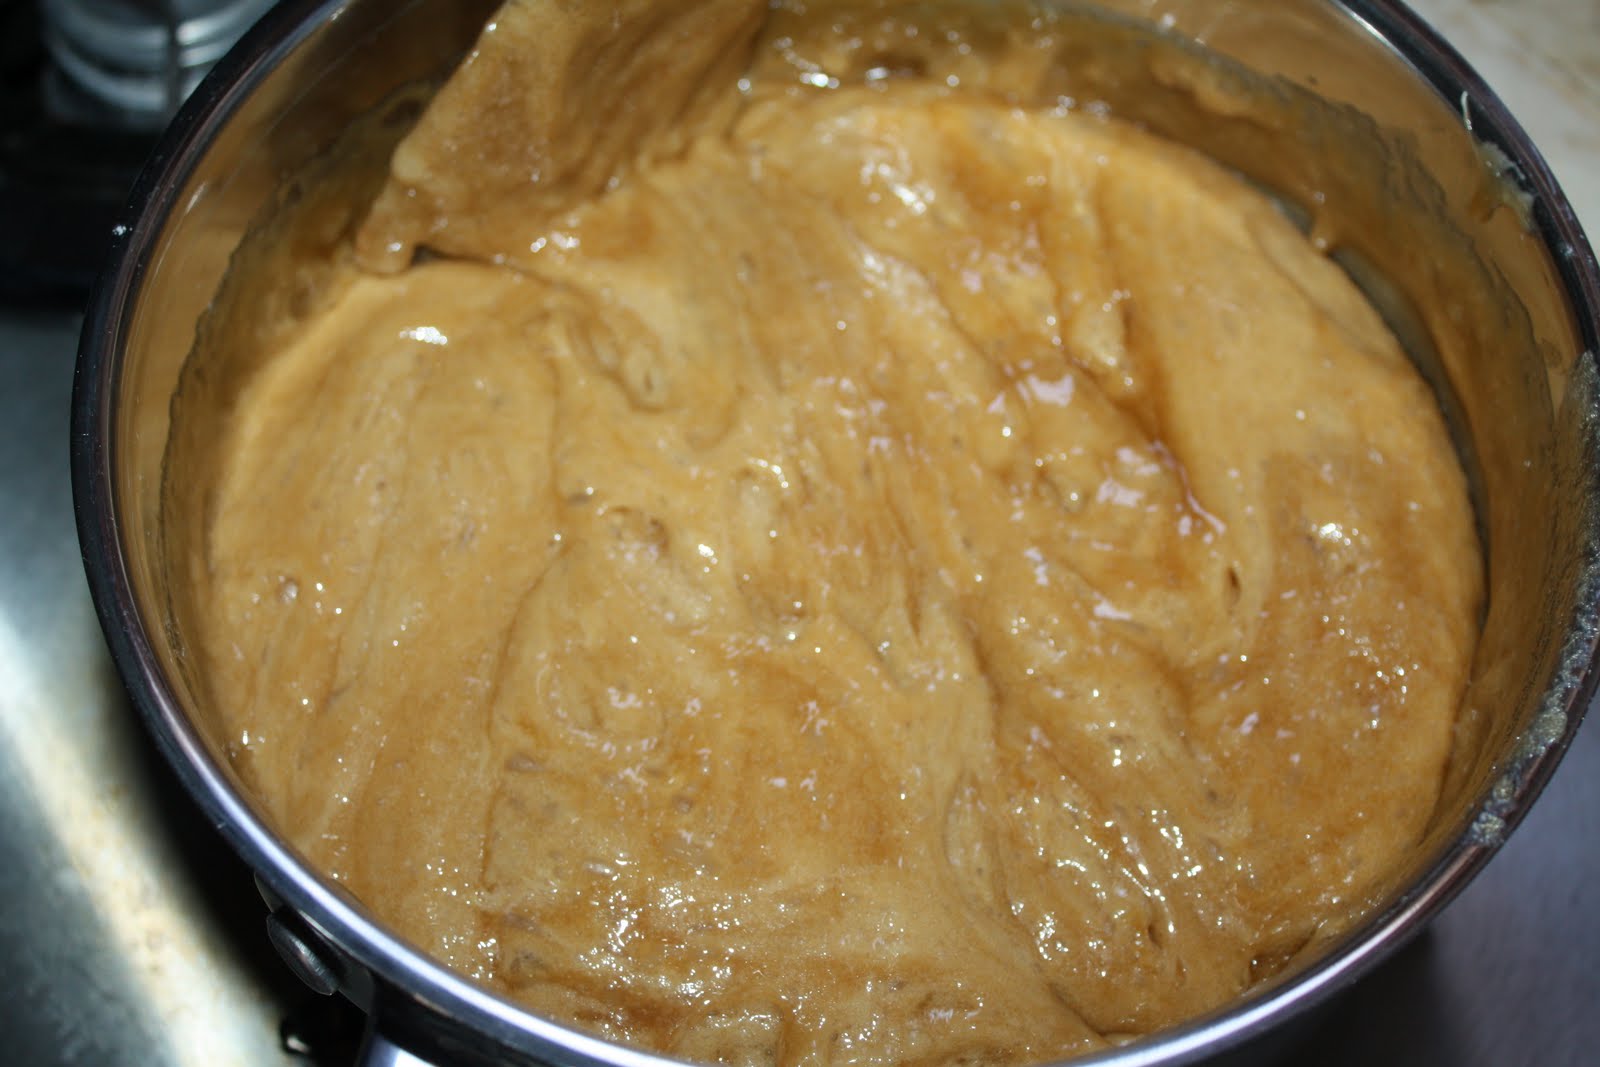
When your five minute timer goes off, turn off the heat and immediately add the baking soda.


Stir carefully until the soda is completely incorporated.


Kind of like this. :-)


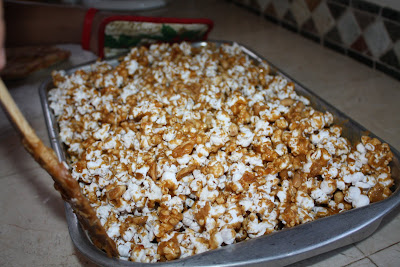
Now pour the caramel over the popcorn and peanuts trying to cover as much surface area as you can.


Kind of like this. :-) Clean up the edges before it goes into the oven. 300 °F for 15 minutes.


This is what you get in 15 minutes.


Your caramel corn needs stirring every 15 minutes to distribute that lovely caramel onto every piece of popcorn. Stir it up by scooping straight down along the edge of the pan.


Run your spatula along the bottom of the pan to scoop up any caramel and then lift your spatula straight up. You want to stir carefully so you do not crush your popcorn.


When everything is stirred up and all the caramel corn that fell out of the pan is tucked back in, put the caramel corn back in the oven for another 15 minutes. The caramel corn needs to be baked for one hour total with a stir every 15 minutes. When the caramel corn is baked, stir it for a few minutes as it cools. If you don't stir at the end, the caramel corn will cool in a brick the shape of your pan.


Caramel Corn


Ingredients:


5 or 6 quarts of popped pop corn
16 oz peanuts

Caramel:
1 teaspoon salt
2 cups brown sugar
1 cup butter
1/2 cup light corn syrup

1/2 teaspoon baking soda

Directions:


1. Preheat oven to 300 °F.

2. Put the popcorn and peanuts in the largest pan you have.

3. Put the butter, salt, brown sugar and corn syrup in a large saucepan over medium high heat. Stirring, bring the mixture to a boil and boil for five minutes. Do not boil any longer than five minutes.

4. Take the caramel off the heat and add the 1/2 teaspoon of baking soda. Stir when caramel bubbles calm down.

5. Pour the caramel over the peanuts and popcorn covering as much popcorn as possible. Bake in the oven for one hour. Stir the popcorn and peanuts every 15 minutes.

6. When caramel corn comes out of the oven, stir it for a few minutes until it cools down. Enjoy.

For a printer friendly version of this recipe click here.


I am linking up to Stone Gable's On The Menu Monday

Saturday, September 4, 2010

Back To School and a Snack Recipe


New shoes, new clothes, new schedules, new teachers, new subjects, and new school supplies are all part of the excitement of going back to school. I love how hard my kids seem to attack life. I love seeing their passion and intensity when something is important to them. Each of their personalities come out and shine in different ways.


All their excitement and hard work can work up an appetite! Sometimes a granola bar or a banana cuts it in the snack department and sometimes it doesn't! So for the days that the kids come home STARVING I try to serve them something a little more substantial. And since this is one of my favorite lunches, I usually have the ingredients on hand for this snack.


This is a fantastic little super snack or appetizer. I usually use a whole grain French bread, but for the kids I am using a white loaf of soft French bread. The cheese is super mild and contains protein and calcium. And the avocado is not only yummy but a great source of heart healthy omega three's and fiber! So serve this snack with a smile and confidence that you are doing something really good for your kids and yourself.


The board of ingredients is again simple things that will be transformed into something amazing with very little work.


Start with a 3/4 inch slice of bread. Pop it is the toaster and toast it on the highest setting you can get without burning your bread. You want crunchy toasted bread for this snack.


Drizzle a touch of extra virgin olive oil on the bread and sprinkle a bit of salt and pepper on the bread. At this point, you have got something really yummy, but we are not finished yet.


Add a thin slice of fresh mozzarella cheese to the seasoned hot bread. It is not going to melt all the way and you don't want it to. You just want the cheese slightly warmed.


Avocados are so amazing. I love them. I really love them. Now you want to cut your avocado in half by running the knife along the middle of your avocado. See the picture below for a visual guide.


Twist the halves in opposite directions.


Then gently pull the avocado apart. This is a beautiful avocado. Sometimes when you bring them home from the grocery store they still need a bit of time to ripen. A ripe avocado should smell like an avocado and it should have the tiniest bit of give to it when you press gently on the skin.


Run your knife through the avocado to slice it while it is still in the tough skin. It is just easier to slice the fruit before you peel it. Trust me.


To peel the avocado, just run a spoon between the avocado flesh and the skin. Spin the spoon around a few times until everything separated.


Top your fresh mozzarella slices with a few avocado slices. Drizzle a tiny bit of fruity olive oil over the avocado. Finally the tiniest sprinkle of kosher salt finishes this snack.


Avocado Snack Recipe

1 Avocado, Sliced
4 Slices of Bread, Toasted
4 Slices of Fresh Mozzarella Cheese
Olive Oil
Salt and Pepper

1. Drizzle a tiny bit of olive oil over the toasted bread and season with salt and pepper.

2. Put a slice of cheese on each piece of toast.

3. Add three slices of avocado to each piece of toast. Drizzle with olive oil and sprinkle with salt.

4. Makes 4 snacks. Enjoy.


***Note, I made a double batch and three of them never even made it to the plate!